For most precision-engineered glass components, UV laser marking is the safest default, delivering high-contrast, crack-free marks without the thermal stress that thicker beams introduce. Femtosecond subsurface engraving takes over where a tamper-proof internal Data Matrix is required, and CO₂ stays limited to decorative or hot-end production marking. Whichever method you specify, insist on a locked process qualification record (PQR) and full IQ/OQ/PQ validation before accepting production parts, in line with practices such as NASA’s PRC-9003. Precision Glasses builds every marking job around exactly that discipline.
TL;DR:
- UV laser marking is safest for thin-walled or sensitive glass due to its low thermal impact and microcracking risk, especially on soda-lime and borosilicate glass.
- Femtosecond and deep-UV excimer lasers are ideal for internal or high-resolution marks on optical glass, but require strict process validation including PQR documentation.
- All laser marking methods necessitate thorough qualification with representative coupons, detailed process records, and inspection to prevent defects like microcracking or faint markings.
- Proper environmental controls, safety measures, and verified process parameters are essential for consistent quality and safety compliance in glass laser marking.
- Permanent laser marks are mandatory for safety-critical applications, while temporary marks remain suitable for internal tracking or pre-assembly identification.
Table of Contents
- What are the main laser marking methods for glass?
- Which glass types and designs suit laser marking?
- What qualification and testing evidence should you demand?
- How does laser marking fit into production line integration?
- What should go into your procurement specification?
- What laser safety measures apply to glass marking?
- What are the common defects in laser-marked glass and how do you fix them?
- Do post-marking treatments improve durability or contrast?
- How do temperature and humidity affect marking quality?
- Should you specify permanent or temporary marks?
- Precision Glasses’ approach to qualifying glass laser marks
- Get a qualification run started with Precision Glasses
- Where to read more on marking standards and process validation
- Sources
What are the main laser marking methods for glass?
Four technologies dominate industrial glass marking, and each works on a different physical principle. UV lasers at 355 nanometres rely on photochemical ablation rather than heat, which is why they minimise thermal shock and microcracking on thin-walled or sensitive parts. CO₂ lasers work thermally, melting the surface to create a frosted mark, which raises microcrack risk on load-bearing components. Femtosecond and other ultrafast lasers deposit energy in pulses so short that they can engrave inside the glass without breaking the surface, leaving a subsurface mark that cannot be ground off. Deep-UV excimer systems (193 nanometres) sit at the high end, capable of micrometre-resolution, damage-free marks on TiO₂-containing optical glass, though the equipment and process controls needed to run them are considerably more specialised.
Matching method to application comes down to risk tolerance and part geometry:
- Pharmaceutical vials and thin-wall labware: UV surface marking, for its low thermal input and consistent contrast on small-diameter, thin-wall parts.
- Display and cover glass: UV for surface serialisation, or femtosecond where the mark must sit beneath a coated or laminated surface.
- Decorative or hot-end glass: CO₂, where frosting is acceptable or even desired, and where marking happens while the glass is still hot on the production line.
- Zirconia and technical ceramics: fibre or green/UV lasers depending on the exact formulation and required contrast.
Cost and throughput scale roughly with precision. UV systems sit in the middle of that range, femtosecond and excimer platforms cost more to buy and qualify, and CO₂ remains the cheapest option per part, though it is a poor default for anything thin, safety-critical, or structurally loaded.
Which glass types and designs suit laser marking?
Not every glass chemistry behaves the same way under a beam. Soda-lime glass takes UV and CO₂ marking well and is the most forgiving substrate you will specify. Borosilicate, common in pharmaceutical and lab components, favours UV because its lower thermal expansion coefficient still cracks under sustained CO₂ heating on thin sections. TiO₂-containing optical glasses respond particularly well to deep-UV excimer marking, which is worth knowing if your part specification already calls for that glass family. Leaded crystal is the outlier: its lead content interacts unpredictably with high-energy beams, so treat it as a case requiring bespoke trial runs rather than a standard recipe.
Design decisions matter just as much as material choice:
- Specify a minimum wall thickness before marking, since thin sections concentrate residual stress around the mark.
- Locate marks in low-stress zones away from edges, mounting points, or existing fabrication features detailed in glass fabrication process guidance.
- Check compatibility with any coating or anodic finish; some coatings absorb laser energy differently to bare glass, which changes contrast and can cause delamination at the mark edge.
- Set character height and quiet-zone margins to match the read distance and verifier grade required, particularly for Data Matrix or GS1-style codes.
Pro Tip: Ask your supplier for a marking trial on the exact glass grade and coating combination you specify, not a generic “similar glass” sample. Contrast and crack behaviour shift noticeably between coated and uncoated variants of the same base glass.
What qualification and testing evidence should you demand?
Cosmetically acceptable marks are not the same as validated marks. In regulated sectors, auditors reject marking processes that lack a documented PQR, regardless of how the finished part looks, a requirement made explicit in NASA’s process specification for laser marking. Before accepting production parts, insist on:
- A locked PQR recording laser power, pulse width, repetition rate, scan speed, focus position, and lens configuration, with no undocumented deviation permitted.
- Representative coupon testing on the same glass type, thickness, and finish as production parts, not a convenient stand-in substrate.
- Cross-sectioning and 10× magnification inspection of the heat-affected zone and recast layer to confirm no microcracking has propagated from the mark.
- A documented pass/fail standard for 2D code grading, tied to the read grade your downstream scanning equipment actually needs.
Femtosecond subsurface marks carry an added requirement: validation should include crush and vision testing at full production throughput, with an established energy margin around the nominal setting to guard against drift. A supplier who cannot produce coupon evidence and a signed PQR on request has not qualified the process; they have simply marked a sample and hoped it holds.
How does laser marking fit into production line integration?
Where marking happens in your process changes the risk profile considerably. Hot-end on-the-fly marking, applied while glass is still hot on the production line, reduces cracking risk but demands specialised hardware and tight timing control. In-line cold marking after forming is more common for finished components and easier to retrofit, though it needs its own thermal management to avoid stress at the mark site. Off-line batch marking offers the most process control but adds a handling step and cycle time.
Whichever mode you choose, the vision system matters as much as the laser. Camera lighting, decoding software, and target read grades all need specifying up front, and a matched verification system is essential to reach Grade 4 reading at production speeds rather than relying on the mark quality alone. Ask suppliers for on-line read-rate statistics as proof, not a one-off demonstration.
- Confirm serialisation format (Data Matrix, GS1, or UDI) before tooling is finalised.
- Require API or database integration for traceability records if parts feed a regulated supply chain.
- Ask what audit logs and operator controls exist to prevent unauthorised parameter changes on the line.
What should go into your procurement specification?
A drawing note that simply says “laser mark per customer requirement” invites disputes later. Every marking call-out should reference the governing PQR, state the required character height and location, and name the inspection method that will confirm compliance.
Deliverables to require from any supplier before sign-off:
- The signed PQR with locked equipment settings and process parameters.
- Representative coupon results, including cross-section photographs and crack inspection records.
- A sample production lot with fully traceable serial numbers matching your database format.
- A reading and grading report for every code type specified.
- Operator logs covering machine setup, parameter changes, and any deviations during the run.
Acceptance testing should define sample size upfront (a fixed percentage of each lot, not an arbitrary handful), specify inspection tools including a 10× microscope and code verifier, and set clear rework versus reject criteria with named responsibility on both sides.
| Deliverable | Purpose | Who typically checks it |
|---|---|---|
| Signed PQR | Locks laser parameters to prevent drift | Supplier QA, customer audit |
| Coupon cross-section | Confirms no microcracking in heat-affected zone | Supplier QA under 10× magnification |
| Read/grade report | Confirms code meets verifier standard | Customer receiving inspection |
| Operator log | Traces any process deviation to root cause | Supplier production control |
Reference documentation on quality standards in glass manufacturing gives a useful baseline for structuring this paperwork if you are drafting a specification from scratch.
What laser safety measures apply to glass marking?
Marking glass introduces two safety considerations that differ from metal marking, and both deserve a line in your safety procedure rather than an assumption of “standard laser precautions.”
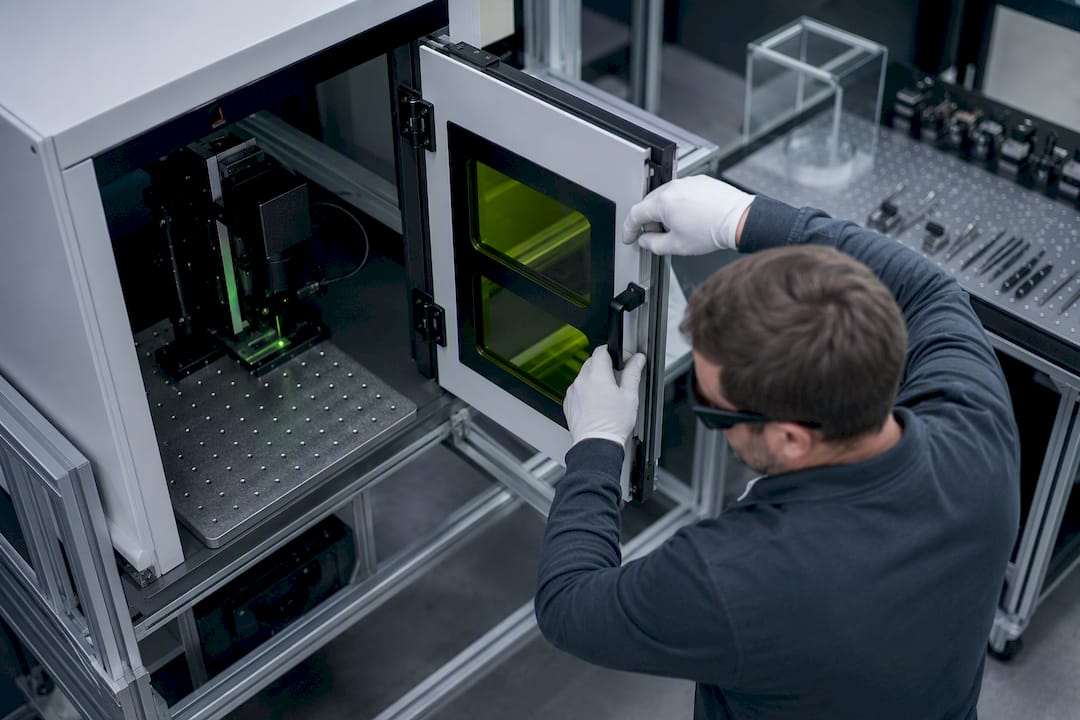
Eye protection needs matching to wavelength, not just laser class. UV systems at 355 nanometres and deep-UV excimer units at 193 nanometres demand specific-wavelength safety glasses, since standard CO₂-rated eyewear does not block UV effectively. Glass surfaces can also reflect or refract beams unpredictably compared with matte metal, so enclosure interlocks and beam containment matter more here than operators sometimes assume, particularly around femtosecond systems where the beam path includes focusing optics close to the work surface.
Fume management is the second concern. Ablating glass, especially coated or laminated glass, can release fine particulates and, depending on coating chemistry, low levels of volatile compounds. Local extraction at the mark point, rather than general workshop ventilation, is the practical standard for any enclosed marking cell. Coated automotive and display glass in particular can carry anodic or anti-reflective layers that behave differently under laser ablation than bare glass, so ask what extraction and filtration capacity a supplier has validated for the specific coating on your part, not just for bare glass in general.
What are the common defects in laser-marked glass and how do you fix them?
The three defects that recur most often across suppliers are chipping at the mark edge, faint or low-contrast marks, and unwanted microcracking radiating from the marked area. Each traces back to a parameter mismatch rather than a fundamental limitation of the process.
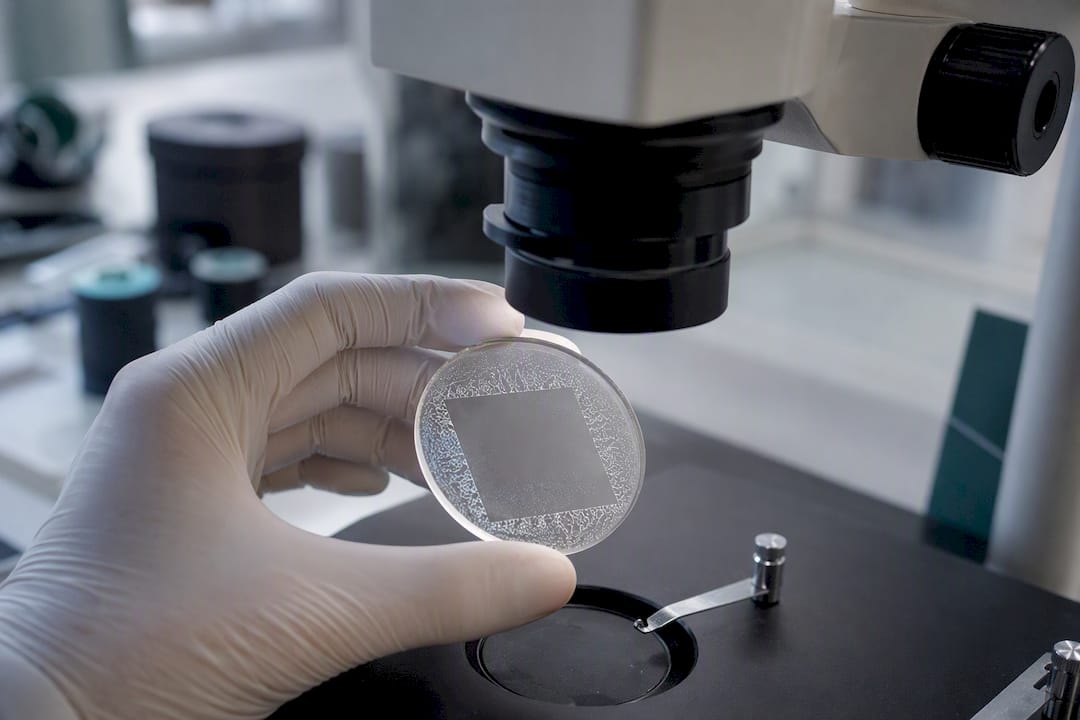
Chipping usually means the energy density is too high for the glass thickness at that location, often because a parameter set validated on one part thickness gets reused on a thinner variant without retesting. Faint marks point the other way: insufficient energy or too fast a scan speed, common when a supplier tries to push cycle time down without re-qualifying the coupon. Microcracking radiating outward from a mark is the defect that matters most in safety-critical applications, and it is exactly what 10× magnification cross-section inspection exists to catch before parts ship.
The fix in all three cases is the same discipline: run an iterative test matrix across power, speed, and focus rather than adjusting one setting at a time on production parts, a practical approach vendors recommend for tuning CO₂ and other thermal processes. Any parameter change wide enough to affect mark appearance should trigger a fresh coupon run, not just a visual check on the next part off the line. Full guidance on tracing these defects back to root cause sits in troubleshooting glass defects resources aimed specifically at engineers specifying marking processes.
Do post-marking treatments improve durability or contrast?
Some marks benefit from a finishing step, and knowing which ones is worth building into your specification rather than leaving to chance. A light chemical clean immediately after marking removes ablation debris that can otherwise dull contrast or leave a faint haze around the character edges, particularly on UV-marked codes where the mark relies on subtle refractive contrast rather than heavy frosting.
Anti-reflective or protective coatings applied after marking can either help or hurt, depending on sequence. Marking before coating generally preserves contrast better, since the coating then sits over a clean mark rather than being disturbed by the marking process itself. Marking through an existing coating, by contrast, risks localised delamination at the mark site if the coating absorbs laser energy differently to the substrate beneath it.
Subsurface femtosecond marks need no post-treatment at all for durability, since the mark sits beneath the surface and cannot be abraded or chemically attacked in normal handling. That is one of the strongest arguments for choosing subsurface engraving on parts that will go through downstream cleaning, sterilisation, or surface finishing steps after marking, since a surface mark exposed to those same steps carries more risk of contrast loss over time.
How do temperature and humidity affect marking quality?
Environmental conditions in the marking cell matter more for glass than for most other substrates, largely because glass responds to thermal gradients rather than absolute temperature. A cold part fed into a marking station straight from a chilled storage area can develop stress differently under the same laser settings validated at room temperature, which is one reason PQRs should specify an ambient temperature range alongside the laser parameters themselves.
Humidity plays a smaller but still measurable role, mainly through its effect on any water film or condensation on the glass surface immediately before marking. Surface moisture can scatter or absorb beam energy inconsistently, producing patchy contrast that looks like a parameter problem but actually traces back to the part’s condition on arrival at the laser head. Production cells running UV or femtosecond systems typically hold humidity within a controlled band and require parts to reach ambient temperature before marking, rather than leaving that variable unmanaged.
The practical takeaway for procurement is to ask whether your supplier’s PQR specifies environmental tolerances, not just laser settings. A parameter set qualified only under ideal lab conditions may not hold up on a factory floor with seasonal temperature swings, and that gap shows up as inconsistent read rates months after the process was signed off.
Should you specify permanent or temporary marks?
Permanent marks, whether UV surface marking or femtosecond subsurface engraving, are the correct choice wherever traceability, compliance, or safety identification is the goal. A serial number on an aerospace sensor window or a UDI code on a medical device housing has to survive the full service life of the part, including cleaning cycles, sterilisation, and handling, which rules out anything that can wear off or be altered.
Temporary marking, typically inkjet, adhesive labelling, or low-energy surface etching, still has a place earlier in the production chain: work-in-progress tracking, batch identification before final assembly, or internal quality-control flags that get removed before the part ships. The distinction matters because mixing the two approaches on the same part without a clear specification creates confusion about which mark is the permanent traceability record and which is a production aid meant to disappear.
For any mark that will appear on a compliance document, a certificate of conformance, or a regulatory submission, permanent laser marking is the only defensible choice, and it should be specified as such on the drawing rather than left to interpretation on the shop floor.
Precision Glasses’ approach to qualifying glass laser marks
Every marking job at Precision Glasses follows the same sequence: design review, sample qualification on representative coupons, a locked PQR, then production under those fixed parameters. We serve medical device, aerospace, and defence customers who cannot accept a mark that looks right but was never validated, and every qualification artefact, from coupon photographs to equipment settings, gets handed over as part of the delivered package, not held back as proprietary process data.
— Alexandra
Get a qualification run started with Precision Glasses
Precision Glasses runs sample qualification jobs the way regulated buyers actually need them: locked PQRs, representative coupon testing, and inspection reporting delivered as documented artefacts you can hand to your own auditors, not a verbal assurance that the process “should be fine.” That matters most for medical, aerospace, and defence parts, where a supplier who cannot produce a PQR on request has effectively asked you to accept an unqualified process.
Our capabilities span technical glass components across medical, defence, aerospace, automotive, lighting, and electronics applications, with batch-level traceability built into every production run. If you are specifying a marking requirement now, the practical next step is to request a sample qualification run against your exact glass grade, thickness, and coating combination, so you have real coupon data before committing to production tooling. Get in touch through Precision Glasses to scope a qualification run and PQR for your next drawing revision.
Where to read more on marking standards and process validation
For readers validating a marking specification internally, NASA’s PRC-9003 remains the clearest public reference for process note wording and coupon qualification requirements. Peer-reviewed work on excimer and deep-UV marking covers the physics behind high-resolution optical glass marks, while Laser Focus World’s coverage of internal engraving and vendor technical notes from suppliers such as Luxinar and ArcusCNC offer practical detail for supplier qualification conversations.
- NASA PRC-9003 for process note and PQR structure.
- Excimer/UV marking literature for high-resolution optical glass applications.
- Laser Focus World for femtosecond internal engraving case detail.
- Vendor technical notes for hardware-specific guidance during supplier selection.
Sources
- Process specification for laser marking & laser engraving (NASA PRC)
- Excimer-laser-based high-resolution and high-contrast marking of glass (Photonics/DOI)
- Ultrafast laser technology enables internal engraving in glass (Laser Focus World)
- Laser marking glass and ceramics: when to use UV lasers (ArcusCNC)
- Glass laser marking and cutting | Luxinar